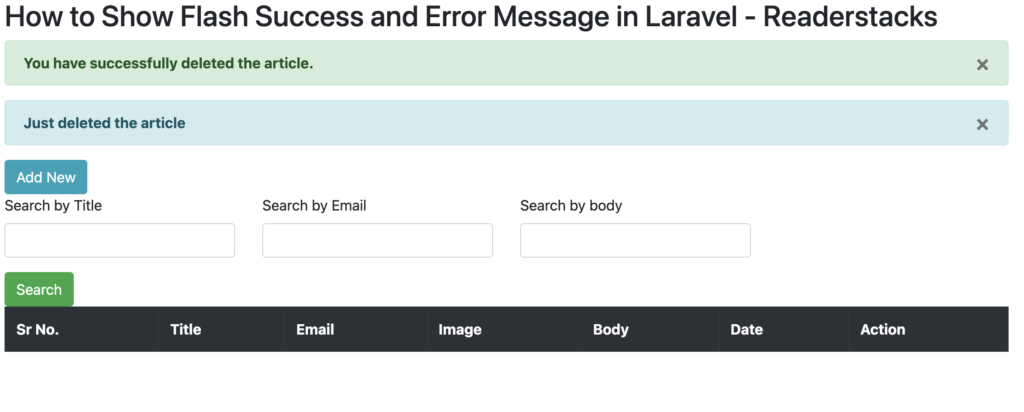
This article aims to teach how to display flash messages indicating success or error in Laravel 10. Flash messages come in handy when notifying users of recent activities such as form submissions or website actions. In such cases, multiple types of messages may be required. Sometimes, error messages need to be displayed, and users redirected to the last page with an error message. On other occasions, success messages should be shown after successful form submissions.
To illustrate how to use flash messages, we will provide an example that can be implemented in any Laravel version, including Laravel 5, 6, 7, 8, 9, and 10.
Laravel stores all messages in session for one request and removes them in the next request.
We will use bootstrap alert to show messages in this example and set any message type, such as error message after redirect, success message after redirect, warning message after redirect, etc.
Let’s begin the tutorial on how to display flash success and error messages in Laravel
Step 1: Create a laravel project
First step is to create the Laravel 8 project using composer command or you can also read the Simplest Way to Install Laravel 10 and Laravel artisan command to generate controllers, Model, Components and Migrations
composer create-project laravel/laravel crud
Step 2: Create a Flash View File
Now, Create a file to show the flash message in our application. In laravel there is 5 types of messages we can show in laravel as follow
- Success
- Error
- Warning
- Info
- Validations
So lets create file and show them as follow
@if ($message = Session::get('success'))
<div class="alert alert-success alert-block">
	<button type="button" class="close" data-dismiss="alert">×</button>
        <strong>{{ $message }}</strong>
</div>
@endif


@if ($message = Session::get('error'))
<div class="alert alert-danger alert-block">
	<button type="button" class="close" data-dismiss="alert">×</button>
        <strong>{{ $message }}</strong>
</div>
@endif


@if ($message = Session::get('warning'))
<div class="alert alert-warning alert-block">
	<button type="button" class="close" data-dismiss="alert">×</button>
	<strong>{{ $message }}</strong>
</div>
@endif


@if ($message = Session::get('info'))
<div class="alert alert-info alert-block">
	<button type="button" class="close" data-dismiss="alert">×</button>
	<strong>{{ $message }}</strong>
</div>
@endif


@if ($errors->any())
<div class="alert alert-danger">
   <ul>
       @foreach ($errors->all() as $error)
            <li>{{ $error }}</li>
      @endforeach
   </ul>
</div>

@endif
Step 3: Include flash view in theme layout
Next, Include the above create file resources/views/flash-messages.blade.php in our application theme as follow
<!DOCTYPE html>
<html lang="{{ str_replace('_', '-', app()->getLocale()) }}">

<head>
  <meta charset="utf-8">
  <meta name="viewport" content="width=device-width, initial-scale=1">

  <title>How to Show Flash Success and Error Message in Laravel - Readerstacks </title>
  <script src="{{asset('js/app.js')}}" crossorigin="anonymous"></script>
   <link href="//netdna.bootstrapcdn.com/bootstrap/4.1.1/css/bootstrap.min.css" rel="stylesheet" />

</head>

<body>
    <div class="container">

        <div class="panel panel-primary">
            <div class="panel-heading">
                <h2>How to Show Flash Success and Error Message in Laravel - Readerstacks</h2>
            </div>
            <div class="panel-body">
            @include('flash-message')
            @yield('content')
            </div>
        </div>
    </div>
</body>
</html>
This will include the messages view in all pages of application.
Step 4: Show Flash Messages
In this final step we will show the error messages according the message types so you can create a controller a put the follow code
<?php

namespace App\Http\Controllers;

use App\Models\Article;
use Illuminate\Http\Request;
use Illuminate\Support\Facades\Validator;

class ArticleController extends Controller
{
    /**
     * Display a listing of the resource.
     *
     * @return \Illuminate\Http\Response
     */
    public function index(Request $request)
    {
        $articles = Article::paginate(2);

        return view('articles.list ', ['articles' => $articles]);
    }

    /**
     * Show the form for creating a new resource.
     *
     * @return \Illuminate\Http\Response
     */
    public function create()
    {
        return view('articles.create');
    }

    /**
     * Store a newly created resource in storage.
     *
     * @param  \Illuminate\Http\Request  $request
     * @return \Illuminate\Http\Response
     */
    public function store(Request $request)
    {
        $validator = Validator::make($request->all(), [
            'title' => "required",
            'email' => "required|email|unique:articles",
            'image' => 'required|image|mimes:jpeg,png,jpg,gif,svg|max:4096',
        ]);
        if ($validator->fails()) {
            return redirect()->back()->withInput()->withErrors($validator->errors());
        }

        return redirect()->route("articles.index")
            ->with('success', 'You have successfully created the article.');
    }

    public function edit($id)
    {
        return view('articles.update', ["article" => Article::find($id)]);
    }


    public function update(Request $request, $id)
    {
        $validator = Validator::make($request->all(), [
            'title' => "required",
            'email' => "required|email|unique:articles,email," . $id,
            'image' => 'required|image|mimes:jpeg,png,jpg,gif,svg|max:4096',
        ]);
        if ($validator->fails()) {

             $request->session()->flash('error', 'Some Errors in the form');
             return redirect()->back()->withInput()->withErrors($validator->errors());
        }

        return redirect()->route("articles.index")
            ->with('success', 'You have successfully created the article.');
    }


    public function destroy(Request $request,$id)
    {
        Article::find($id)->delete();
        $request->session()->flash('info', 'Just deleted the article');

        return redirect()->route("articles.index")
            ->with('success', 'You have successfully deleted the article.');
    }
}
So here to show messages we used as follow
Show Error message after validation failed
return redirect()->back()->withInput()->withErrors($validator->errors());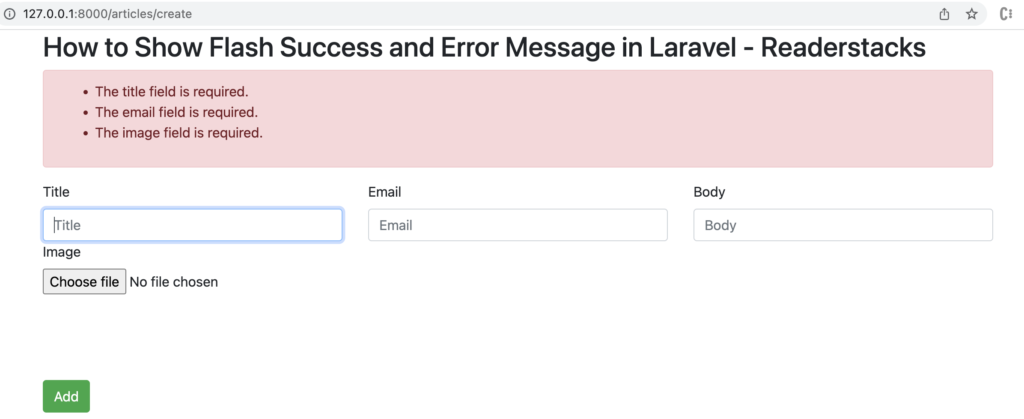
Show Success message After Redirect
 return redirect()->route("articles.index")
            ->with('success', 'You have successfully created the article.');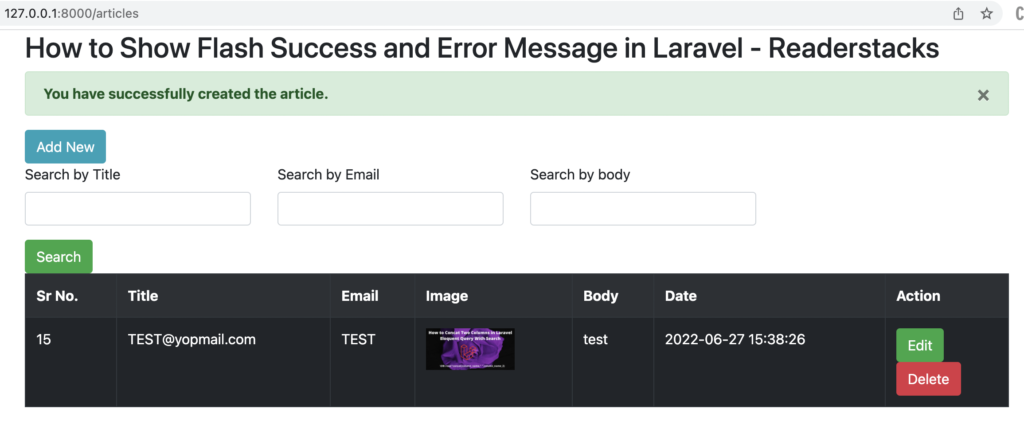
Show Info message After Redirect
return redirect()->route("articles.index")
            ->with('info', 'You have successfully deleted the article.');