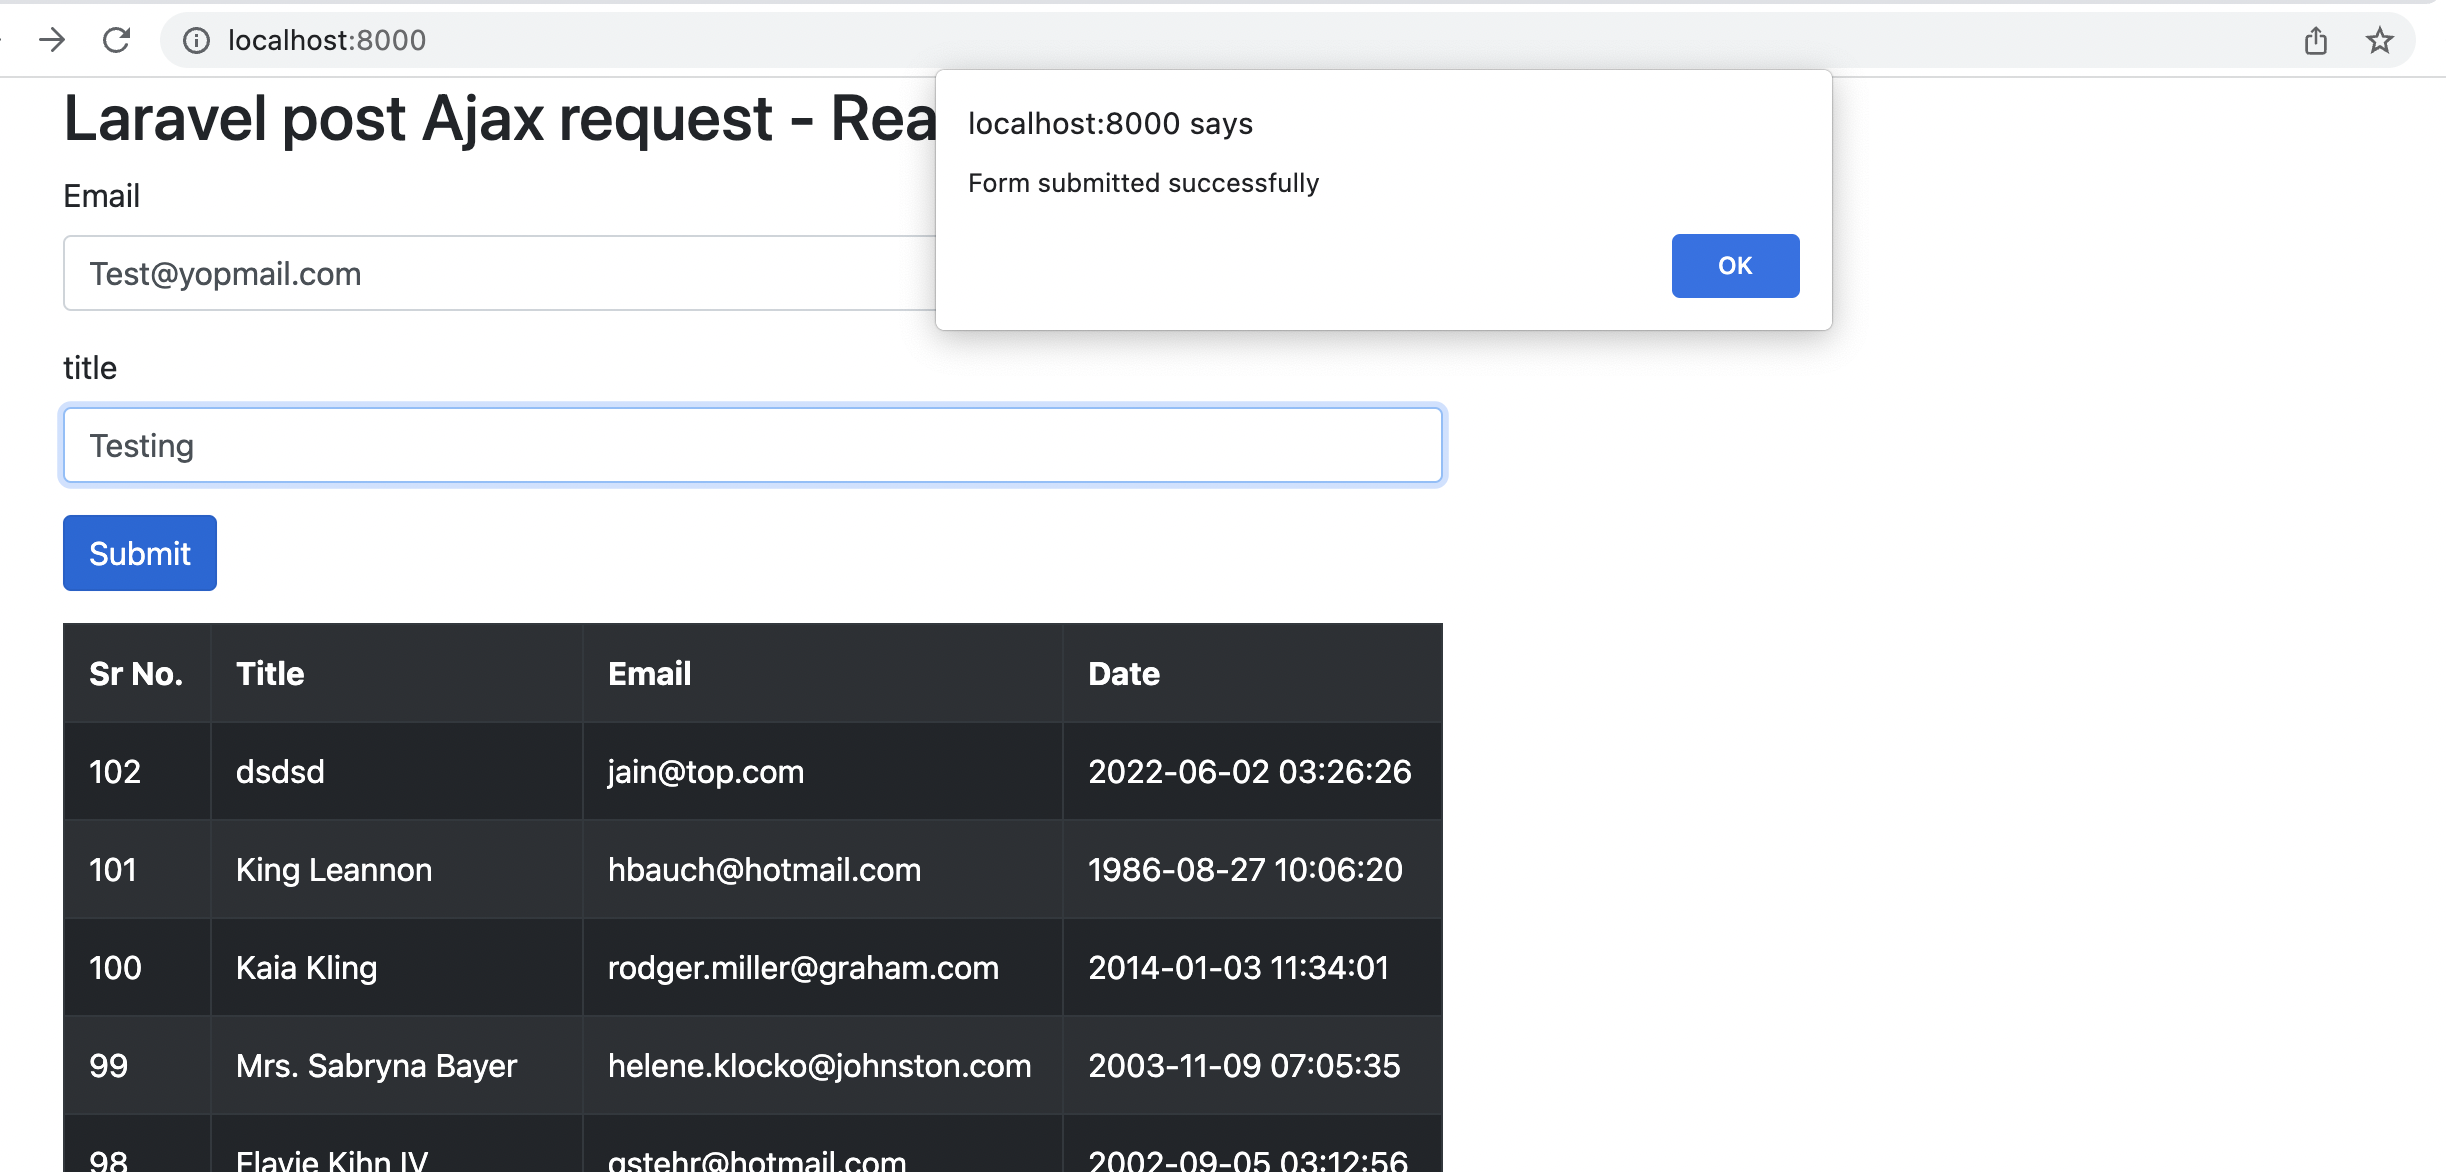
Post Ajax request in laravel is use to communicate with server without reloading the page. Ajax requests are useful when we do not want to refresh the page and update the content of page so in that case Ajax request are very useful. Sometimes its also useful while submitting a form. for example submitting a form with email or other fields and we want to apply server side validations then we can show server side validation without loosing the current values of fields.
In this article i will show you to use Post Ajax Request in Laravel. For this purpose we will use jQuery, using jQuery we will use post method of it and send the request to the server.
We will understand this with a simple example of a form with validation and insert the data database using controller, model and views.
Laravel ajax request is almost same as other languages, only thing we need to keep in mind is csrf token in post request so add it as below
<script type="text/javascript">

    $.ajaxSetup({
        headers: {
            'X-CSRF-TOKEN': $('meta[name="csrf-token"]').attr('content')
        }
    });
  //or

   $.post("url",{
    "_token":$('meta[name="csrf-token"]').attr('content')
    },function(data) {  })
</script>
Let’s start the tutorial of use Post Ajax Request in Laravel step by step
Step 1: Create a fresh laravel project
Open a terminal window and type below command to create a new project
composer create-project --prefer-dist laravel/laravel blogYou can also read this to start with new project
Step 2 : Create a table and model
Now, for an example i am creating here a table using migration and then i am going to fill the data in it, so create model and migration
php artisan make:model Article -mthis will generate the model and migration file
<?php

namespace App\Models;

use Illuminate\Database\Eloquent\Factories\HasFactory;
use Illuminate\Database\Eloquent\Model;

class Article extends Model
{
    use HasFactory;

}
and migration file database/migrations/timestamp_create_articles_table.php
<?php

use Illuminate\Database\Migrations\Migration;
use Illuminate\Database\Schema\Blueprint;
use Illuminate\Support\Facades\Schema;

class CreateArticlesTable extends Migration
{
    /**
     * Run the migrations.
     *
     * @return void
     */
     public function up()
    {
        Schema::create('articles', function (Blueprint $table) {
            $table->id();
            $table->string('email')->unique();;
            $table->string('title');
            $table->string('body')->nullable();
            $table->timestamps();
        });
    }

    /**
     * Reverse the migrations.
     *
     * @return void
     */
    public function down()
    {
        Schema::dropIfExists('articles');
    }
}
and then migrate the migration
php artisan migrateStep 3 : Create controller
Let’s create a controller and add a methods showArticle and addArticle
php artisan make:controller ArticleControllerand add the below code
<?php

namespace App\Http\Controllers;

use Illuminate\Http\Request;
use App\Models\Article;
use Illuminate\Support\Facades\Validator;

class ArticleController extends Controller
{
    public function index(Request $request){
      return view('articles.article');
    }
    public function getArticles(Request $request){

        $articles = Article::orderBy("id","DESC")->limit(10)->get();
        return view('articles.article-pagination ',['articles'=>$articles]);
     }

     function addArticle(Request $request){

        $validator = Validator::make($request->all(),[
                        'title' => "required",
                        'email' => "required|email",

                    ]);
        if ($validator->fails())
        {
            return response()->json($validator->errors(),422);
        }

         //  save image and name in database
           $Article=new Article();
           $Article->title=$request->title;
           $Article->email=$request->email;
           $Article->save();
           return response()->json(["status"=>true,"message"=>"Form submitted successfully"]);
     }
}
Most important thing which is we have done here is response()->json() method to send the json for ajax request.
response()->json();Here , we added two methods one for to show the form view(showArticle) and addArticle to handle the form submit and validation.
Next, we have added validation for title and email. Email is required and should be format of email. Then, title number should be required.
Step 3: Create blade file for view
Now it’s time to show the form and validation message to our view, so let’s create the view file.
<!DOCTYPE html>
<html lang="{{ str_replace('_', '-', app()->getLocale()) }}">

<head>
  <meta charset="utf-8">
  <meta name="viewport" content="width=device-width, initial-scale=1">

  <title>Laravel post Ajax request - Readerstacks </title>

  <script src="https://code.jquery.com/jquery-3.6.0.min.js" crossorigin="anonymous"></script>
  <link href="//netdna.bootstrapcdn.com/bootstrap/4.1.1/css/bootstrap.min.css" rel="stylesheet" />

</head>

<body>
    <div class="container">

        <div class="panel panel-primary">
            <div class="panel-heading">
                <h2>Laravel post Ajax request - Readerstacks</h2>
            </div>
            <div class="panel-body">

            <form method="post" id="validateajax" action="{{url('add-article')}}" name="registerform">
              <div class="form-group">
                <label>Email</label>
                <input type="text" name="email" value="" class="form-control" />

                @error('email')
                <div class="alert alert-danger">{{ $message }}</div>
                @enderror
                @csrf
              </div>
              <div class="form-group">
                <label>title</label>
                <input type="text" name="title" value="" class="form-control" />

              </div>


              <div class="form-group">
                <button class="btn btn-primary">Submit</button>
              </div>
            </form>
            <div id="pagination_data">

            </div>

            </div>
        </div>
    </div>
</body>
<script>
    $(function() {
      $("#validateajax").on("submit", function() {

          var action = $(this).attr("action");
          var method = $(this).attr("method");
          if (method == "post") {
            $.post(action, $(this).serialize(), function(data) {
              alert("Form submitted successfully")
                $("#validateajax").trigger("reset");
                getArticles();
            }).fail(function(response) {
              $(".alert").remove();
              var erroJson = JSON.parse(response.responseText);
              for (var err in erroJson) {
                for (var errstr of erroJson[err])
                  $("[name='" + err + "']").after("<div class='alert alert-danger'>" + errstr + "</div>");
              }

            });;
          }
          return false;

        });
     var getArticles=function(){
       $.get('{{url("get-articles")}}',function(data){
         $("#pagination_data").html(data);
       })
     }
     getArticles();
    });


  </script>
</html>
And resources/views/articles/article-pagination.blade.php
<table class="table table-striped table-dark table-bordered">
  <tr>
    <th>Sr No.</th>
    <th>Title</th>

    <th>Email</th>

    <th>Date</th>
  </tr>
  @foreach($articles as $article)
  <tr>
    <td>{{$article->id}}</td>
    <td>{{$article->title}}</td>

    <td>{{$article->email}}</td>
    <td>{{$article->created_at}}</td>
  </tr>
  @endforeach
</table>
Step 4: Add jQuery to handle the form submit
Here is the main logic to handle the form submit using jquery. In this step we will handle form submit using the query post method.
  <script>
    $(function() {
      $("#validateajax").on("submit", function() {

          var action = $(this).attr("action");
          var method = $(this).attr("method");
          if (method == "post") {
            $.post(action, $(this).serialize(), function(data) {
              alert("Form submitted successfully")
              $("#validateajax").trigger("reset");
              getArticles();
            }).fail(function(response) {
              $(".alert").remove();
              var erroJson = JSON.parse(response.responseText);
              for (var err in erroJson) {
                for (var errstr of erroJson[err])
                  $("[name='" + err + "']").after("<div class='alert alert-danger'>" + errstr + "</div>");
              }

            });;
          }
          return false;

        });
     var getArticles=function(){
       $.get('{{url("get-articles")}}',function(data){
         $("#pagination_data").html(data);
       })
     }
     getArticles();
    });


  </script>
Here, we added ("#validateajax").on("submit", function() {} to handle the submit event of form. Then, create a post request using $.post and also get the value of form action.
In next line we are handling the fail and success state. if the AJAX failed then it come into the fail block (Http response code 422). if the response code is 200 then it will come into success block.
getArticles function to fetch the lastest added articles from database without reload the page
You can also read Laravel Ajax pagination with search
              $(".alert").remove();
              var erroJson = JSON.parse(response.responseText);
              for (var err in erroJson) {
                for (var errstr of erroJson[err])
                  $("[name='" + err + "']").after("<div class='alert alert-danger'>" + errstr + "</div>");
              }
Above code we are using to show the validation message below the each field.
Step 5: Create routes
Now, open the routes/web.php and add below routes
<?php

use Illuminate\Support\Facades\Route;
use \App\Http\Controllers\ArticleController;


Route::get('/',[ArticleController::class, 'index']);
Route::get('/get-articles',[ArticleController::class, 'getArticles']);
Route::post('/add-article',[ArticleController::class, 'addArticle']);


