Upload image with preview in laravel or for any website can be basic requirement like set up a profile picture to providing the documents. Laravel 9 provides robust functionality to upload and process the image with security.
Laravel simply use Request file method to access the uploaded file and then we can store or validate it with various methods provided by laravel. Even we can upload the image on different cloud servers like AWS.
Laravel has lots of features and packages available on the internet. So in this tutorial I will show you how laravel handle image uploading using it in-build methods.
In this article I am going to create two routes, one controller, model, view and a js file to preview the image file.
Let’s start Upload Image Preview Tutorial in Laravel 9 with simple step by step
Step 1: Create a fresh laravel project
Open a terminal window and type below command to create a new project
composer create-project --prefer-dist laravel/laravel blogYou can also read this to start with new project
Step 2 : Create a table and model
Now, for an example i am creating here a table using migration and then i am going to fill the data in it, so create model and migration
php artisan make:model Article -mthis will generate the model and migration file
<?php

namespace App\Models;

use Illuminate\Database\Eloquent\Factories\HasFactory;
use Illuminate\Database\Eloquent\Model;

class Article extends Model
{
    use HasFactory;

}
and migration file database/migrations/timestamp_create_articles_table.php
<?php

use Illuminate\Database\Migrations\Migration;
use Illuminate\Database\Schema\Blueprint;
use Illuminate\Support\Facades\Schema;

return class extends Migration
{
    /**
     * Run the migrations.
     *
     * @return void
     */
     public function up()
    {
        Schema::create('articles', function (Blueprint $table) {
            $table->id();
            $table->string('email')->unique();;
            $table->string('title');
            $table->string('body')->nullable();
            $table->string('image');
            $table->timestamps();
        });
    }

    /**
     * Reverse the migrations.
     *
     * @return void
     */
    public function down()
    {
        Schema::dropIfExists('articles');
    }
}
and then migrate the migration
php artisan migrateStep 3 : Create controller
Let’s create a controller and add a methods showArticle and addArticle
php artisan make:controller ArticleControllerand add the below code
<?php

namespace App\Http\Controllers;

use Illuminate\Http\Request;
use App\Models\Article;
use Illuminate\Support\Facades\Validator;

class ArticleController extends Controller
{
    public function showArticle(Request $request){

        $articles = Article::all();
        return view('articles.article',['articles'=>$articles]);
     }

     function addArticle(Request $request){

        $validator = Validator::make($request->all(),[
                        'title' => "required",
                        'email' => "required|email",
                        'image' => 'required|image|mimes:jpeg,png,jpg,gif,svg|max:4096',
                    ]);
        if ($validator->fails())
        {
            return redirect()->back()->withInput()->withErrors($validator->errors());
        }
        $file = $request->file("image")->store("uploads/images");

         //  save image and name in database
           $Article=new Article();
           $Article->title=$request->title;
           $Article->email=$request->email;
           $Article->image= $file;
           $Article->save();
           return back()
             ->with('success','You have successfully created the article with compressed image.');

     }
}
In above code we used this code to store the image
 $file = $request->file("image")->store("uploads/images");

         //  save image and name in database
           $Article=new Article();
           $Article->title=$request->title;
           $Article->email=$request->email;
           $Article->image= $file;
           $Article->save();
Step 4 : Create Symblink for Storage
This is an important step and i suggest you to not skip this step, if you are going to show images in your website because you must need to access the image to show it on website so open config\filesystems.php and add public_path('uploads') => storage_path('app/uploads') to links block
<?php

return [

    /*
    |--------------------------------------------------------------------------
    | Default Filesystem Disk
    |--------------------------------------------------------------------------
    |
    | Here you may specify the default filesystem disk that should be used
    | by the framework. The "local" disk, as well as a variety of cloud
    | based disks are available to your application. Just store away!
    |
    */

    'default' => env('FILESYSTEM_DRIVER', 'public'),
    'disks' => [

        'local' => [
            'driver' => 'local',
            'root' => storage_path('app'),
        ],

        'public' => [
            'driver' => 'local',
            'root' => storage_path('app/public'),
            'url' => env('APP_URL').'/storage',
            'visibility' => 'public',
        ],

        's3' => [
            'driver' => 's3',
            'key' => env('AWS_ACCESS_KEY_ID'),
            'secret' => env('AWS_SECRET_ACCESS_KEY'),
            'region' => env('AWS_DEFAULT_REGION'),
            'bucket' => env('AWS_BUCKET'),
            'url' => env('AWS_URL'),
            'endpoint' => env('AWS_ENDPOINT'),
            'use_path_style_endpoint' => env('AWS_USE_PATH_STYLE_ENDPOINT', false),
        ],

    ],
    'links' => [
        public_path('storage') => storage_path('app/public'),
        public_path('uploads') => storage_path('app/uploads'),
    ],

];
Since we are using in our controller this code
$destinationPath= '/uploads/images';

$storageDestinationPath=storage_path('app'.$destinationPath);
so we created a Symblink as
public_path('uploads') => storage_path('app/uploads'),Now run artisan command to run Symblink
php artisan storage:linkOr for shared hosting
Route::get('/artisan-link', function () {
    Artisan::call('storage:link');
});
NOTE: If you are using php artisan serve and virtual host to serve your application then above method will work perfectly but in case you are putting your public/index.php in root folder then you need to add public in URL. Example
URL for php artisan serve and virtual host will be and this will work perfectly
http://localhost:8000/uploads/images/16525039733751202249.png
and you are putting your public/index.php in root folder then you need to add public in URL
http://localhost/projectname/public/uploads/images/16525039733751202249.png
Step 4 : Create View File
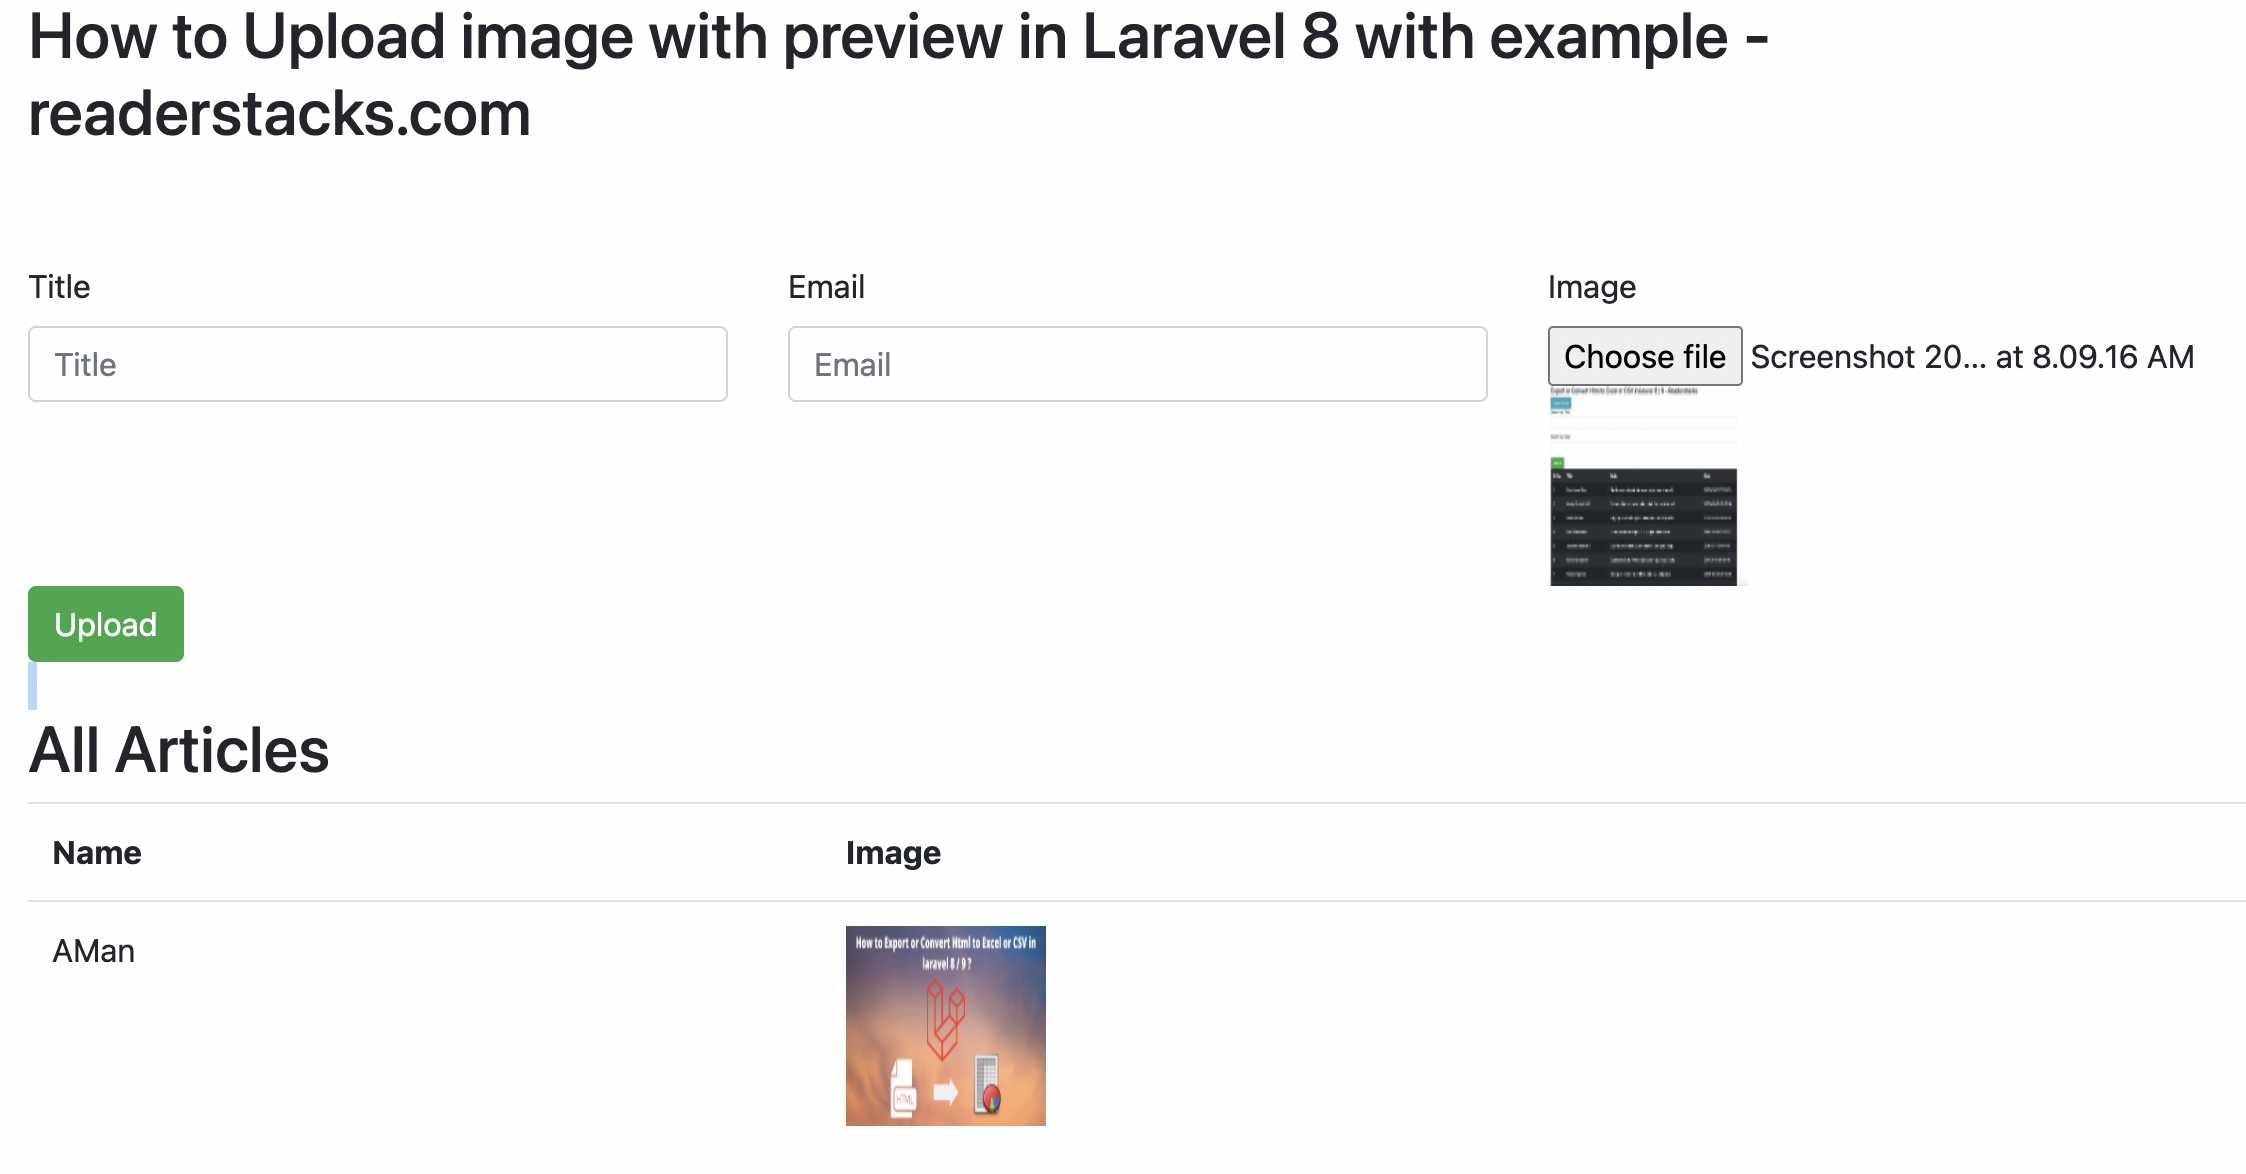
Now, show the upload form in view file and also show the list of compressed images
resources/views/articles/article.blade.php
<!DOCTYPE html>
<html>

<head>
    <title> How to Upload image with preview in Laravel 8 with example - readerstacks.com</title>
    <link rel="stylesheet" href="https://maxcdn.bootstrapcdn.com/bootstrap/4.0.0/css/bootstrap.min.css">
</head>

<body>
    <div class="container">

        <div class="panel panel-primary">
            <div class="panel-heading">
                <h2> How to Upload image with preview in Laravel 8 with example -readerstacks.com</h2>
            </div>
            <div class="panel-body">

                @if ($message = Session::get('success'))
                <div class="alert alert-success alert-block">
                    <button type="button" class="close" data-dismiss="alert">×</button>
                    <strong>{{ $message }}</strong>
                </div>

                @endif
                <br><br>
                <form action="{{ url('add-article') }}" method="POST" enctype="multipart/form-data">
                    @csrf
                    <div class="row">

                        <div class="col-md-4">
                            <label>Title</label>
                            <input type="text" placeholder="Title" name="title" class="form-control">
                        </div>
                        <div class="col-md-4">
                            <label>Email</label>
                            <input type="email" placeholder="Email" name="email" class="form-control">
                        </div>
                        <div class="col-md-4">
                            <label>Image</label>
                             <input type="file" placeholder="Image" name="image" id="imgInp">
                              <img style="visibility:hidden"  id="prview" src=""  width=100 height=100 />

                    </div>
                     </div>
                    <div class="row">


                        <div class="col-md-6">
                            <button type="submit" class="btn btn-success">Upload</button>
                        </div>

                    </div>
                </form>
                <br>
                <h2>All Articles</h2>
                <table class="table">
                    <tr>
                        <th>Name</th>
                        <th>Image</th>

                    </tr>
                    @foreach( $articles as $article)
                    <tr>
                        <td>{{$article->title}}</td>
                        <td>
                             <!-- in case of you are putting index.php in root folder -->
                             <!-- <img height="100" width=100 src="{{asset('public/'.$article->image)}}" /> -->
                            <img height="100" width=100 src="{{asset($article->image)}}" />
                        </td>
                    </tr>
                    @endforeach
                </table>
            </div>
        </div>
    </div>
</body>
<script>
imgInp.onchange = evt => {
  const [file] = imgInp.files
  if (file) {
    prview.style.visibility = 'visible';

    prview.src = URL.createObjectURL(file)
  }
}
</script>
</html>
here we used {{asset($article->image)}} to render the image in web page.
Step 4: Create two routes in routes/web.php
One route for preview the html and another route for upload and compress the image.
routes/web.php
<?php

use App\Http\Controllers\ArticleController;
use Illuminate\Support\Facades\Route;


Route::get('/articles',[ArticleController::class,"showArticle"]);
Route::post('/add-article',[ArticleController::class,"addArticle"]);
Results Screenshot:

I hope it will help you to implement form image uploading. you can also read article How to create multiple size thumbs from image in laravel 8 ? and upload image in angular php.


